Hello everyone;
Today, I will try to share with you Amazon AWS Services and try to share how you can jump a dimension in hosting.
Nowadays, there are so many hosting hosting companies that we have been thinking for a long time about which one to host our web pages. However, the fact that the infrastructures of the server systems owned by each hosting company are not complete and sufficient or do not fully meet your requests and needs also infuriates people who are trying to set up web portals.
If you have an infrastructure that is insufficient for the web portals you have built or will build, I think Amazon Lightsail services will come to you like a medicine.
To briefly mention Amazon Services, this is not a new system. For many years, I have been talking about a whole of services that work with infrastructures similar to Amazon servers, not per service, but a system infrastructure with a pricing base based on the usage rate.
In Turkey, many companies such as sigortam.net use this infrastructure. I gave an example from a portal like Sigortam.net because, when you consider the ads on TV and in the media, you can imagine how strong the infrastructure must be for the site to work without any errors and for all incoming visitors to continue smoothly.
Amazon Lightsail brings a lot of convenience for those who want to set up a wordpress in the simplest way. I can also say that the first month free for all users is a separate gesture.
As I mentioned above, Amazon Lightsail is included in the pricing policy according to usage. You can use it in any way you want, from $3.50 per month to $160 per month.
Before you get started, you can see the prices below.
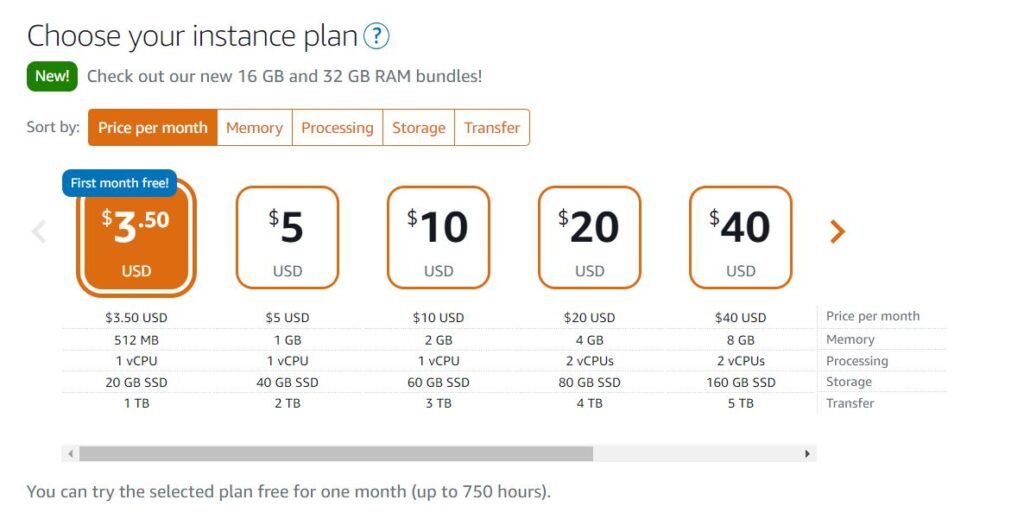
Let’s start step by step and let me try to help you as much as we can… The most important thing that draws attention here is that you consider that you rent a mini server of your own for the price of shared hosting. So there is only you in the system you are in. Different portals are not hosted.
Content
1-) Account Setup on Amazon AWS
You can easily create an account by clicking on the link here. Amazon AWS (Amazon Web Service) has hundreds of components within itself. I am only going to explain Lightsail, which is one of the easiest components.
After completing the form that appears and completing the e-mail activation process, log in and you will see the page on the left side. At this stage, it may ask you for a credit card verification. You can continue the process by defining a virtual card for your own financial security.
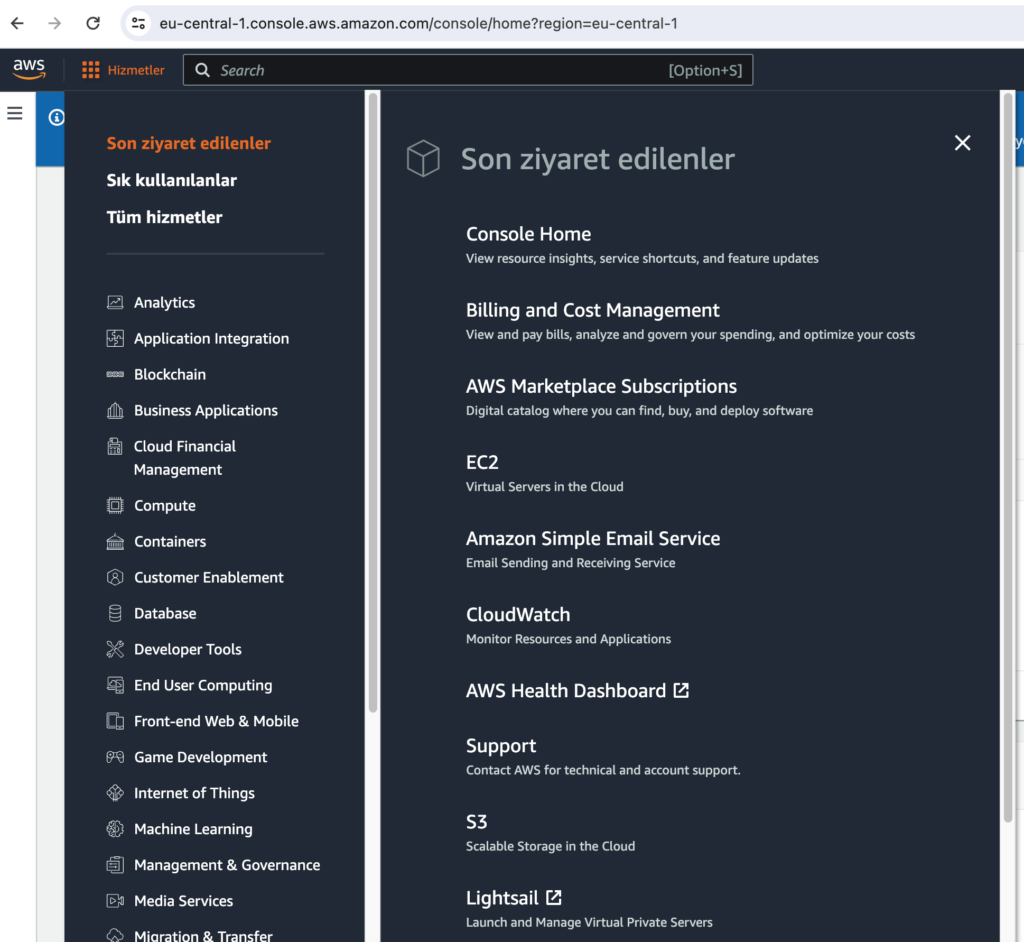
As you may have noticed, you see a menu with many options. Knowing all of them requires both high-level software engineering work and serious skill. To build a WordPress site, you only need to know Lightsail.
At this point, let’s open our page by typing “Lightsail” from the “Find Services” search engine above or by clicking the “Lightsail” button under the “Compute” menu 2 and I will start sharing the Lightsail section with you.
2-) Creating a New “Instance”
There is a little something you need to know before you press this button. Amazon AWS infrastructure is available everywhere in the world. This means that you need to choose the closest geographical region according to the region you want to address.
For example, if you are thinking of setting up an e-commerce site in the English language and targeting the United States, it would not be the right option to have the server location in Istanbul or Turkey. But if you are dreaming of a Turkish language portal that you want to be live in Turkey, you just need to choose the Frankfurt option in Amazon AWS and have a connection on the same continent.
If your website is very large and the upload speed of the images is slow, I will share the Cloud Delivery Newtwork (CDN) system you need to use for this in my future articles.
Now click on the “Create Instance” button and select the most suitable region and “WordPress” option.

Now choose a package that you think suits you best.
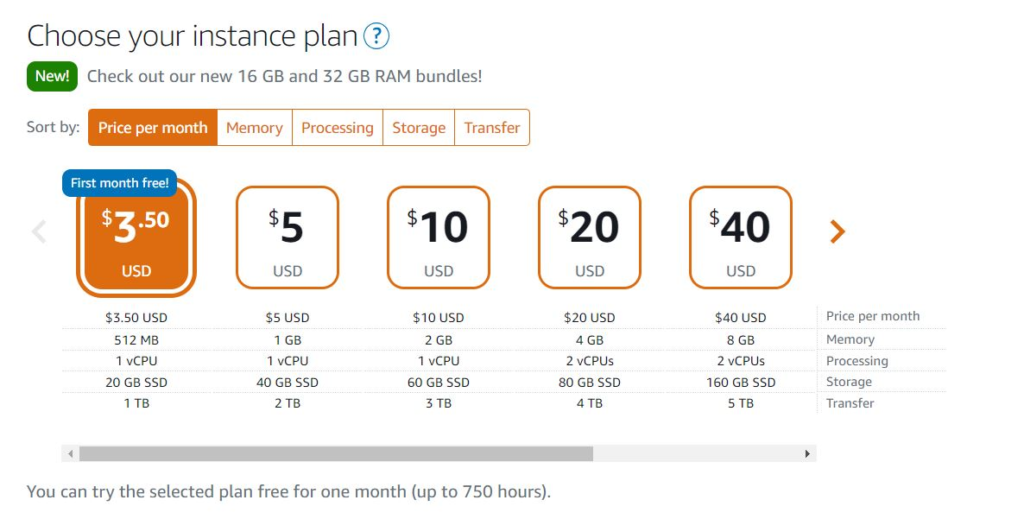
Please do not forget this fine detail here. Consider the hosting space you have and the number of visitors you have. If the package you choose is a large package, the system will not allow you to switch to a small package. However, it will allow you to start from the smallest package and move to larger packages as needed.
On a subpage you will be asked to give a new name to the instance you have created.

Finally, by pressing the “Create Instance” button, we are waiting for our instance to be created for a short time.
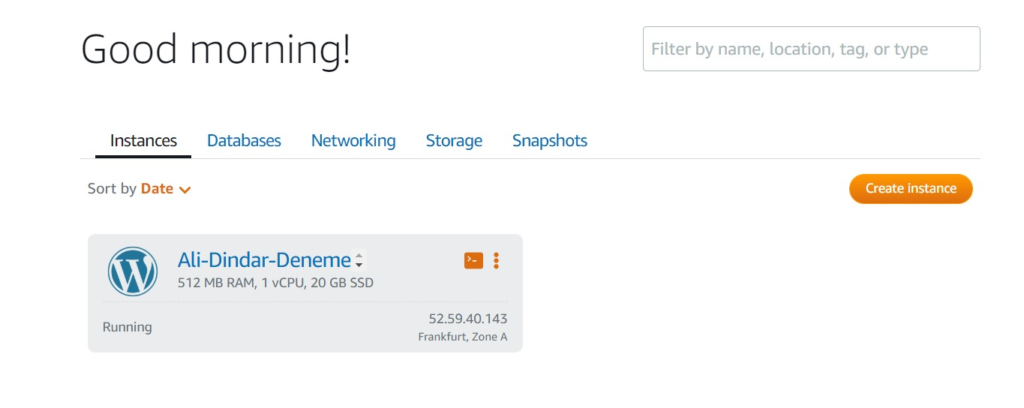
And you have successfully completed the first stage. As of now, you have a wordpress site with “Running” appearing.
Now let’s move on to the stage of getting into this site;
3-) Learning the First Password by Clicking the “Connect Using SSH” Button
We have set up our WordPress site, there is no problem with that, but how to get into it, now I want to share it with you.
After entering your example, a “Connect Using SSH” button will appear in front of you. After clicking there, a code window will open in front of you.
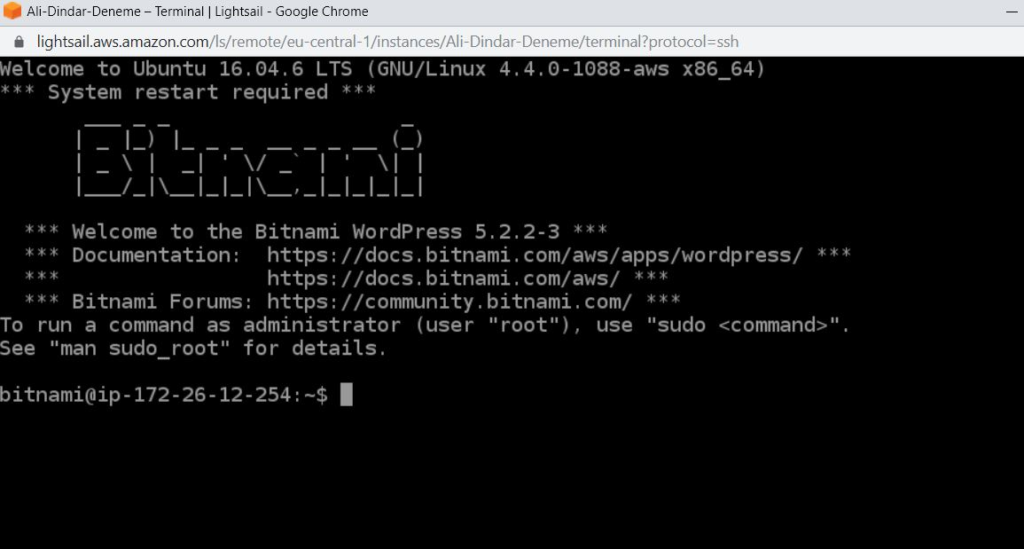
After this window appears, copy and paste the code I wrote below on the screen that appears.
cat bitnami_application_passwordYou will be presented with your admin panel login password.
Please copy this password to a different place. This will be your login password to your /wp-admin page.
4-) Login to WordPress
After reaching this stage, we can now move to our WordPress page.
What we need to do is quite simple. When you type the IP address in the address bar of your browser, you will see that your blog page opens.

You will now see your WordPress page installed. Are we done? Of course we are just starting 🙂
After you see wordpress in front of you, type /wp-admin next to your IP Address in the address bar. For example; 52.59.40.143/wp-admin
In the login screen that appears, we enter “user” in the “Username” section and the password we copied from the SSH screen in the Password section and quickly access the page.
5-) How to Use FTP on a WordPress site Built with Amazon Lightsail
This is actually a topic for a separate chapter. But it is possible to take the shortest and easiest route.
If you are not going to upload very large files, you do not need to connect through a program like File Zilla.
Alternatively, I recommend you to add the following 2 plugins to your wordpress page as soon as you create your WordPress page.
a-) Increase Maximum Upload File Size Plugin
You can find it by clicking Plugins > Add New, typing the plugin name in the search engine or you can download it by clicking here.

You can continue your work by increasing the Maximum Upload Size value through this option. Amazon Lightsail system infrastructure allows this.
b-) Install File Manager Plugin
You can now continue to use it like normal FTP from within this plugin. You can also make any changes you want on this page. You can either install the plugin directly using Plugins > Add New, or download it by clicking here and upload it to the page.
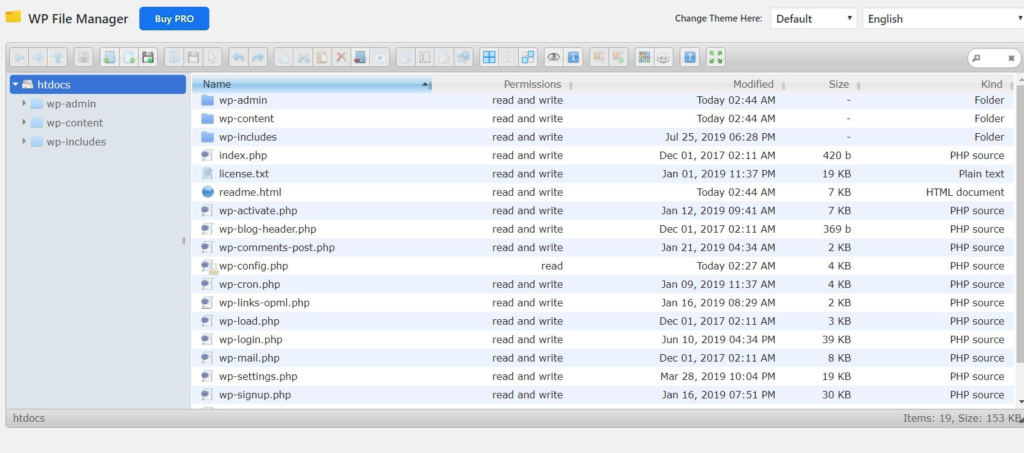
If you have installed this plugin, I strongly recommend that you uninstall it as soon as you are done. I can say that I have had some hacking experiences myself.
6-) How to Remove Bitnami Logo from Your WordPress Page?
A bitnami logo will appear in the bottom right corner of your page and on every page, which will annoy you. To remove it, first go back to your SSH screen.
First copy and paste the following code on the SSH page
sudo /opt/bitnami/apps/wordpress/bnconfig –disable_banner 1Then restart your server and you can do this by copying and pasting the code below to your SSH screen.
sudo /opt/bitnami/ctlscript.sh restart7-) Static IP Determination and Binding to Domain Address
In order for your page to connect to a domain and be added to the DNS address, you need a Static IP. When you click on the “Home” button on the Amazon Lightsail Screen and then click on the “Networking” button, you will see the “Create Static IP” button.
On the screen that will appear, it will be enough to click on “Select an instance” and select your own instance.
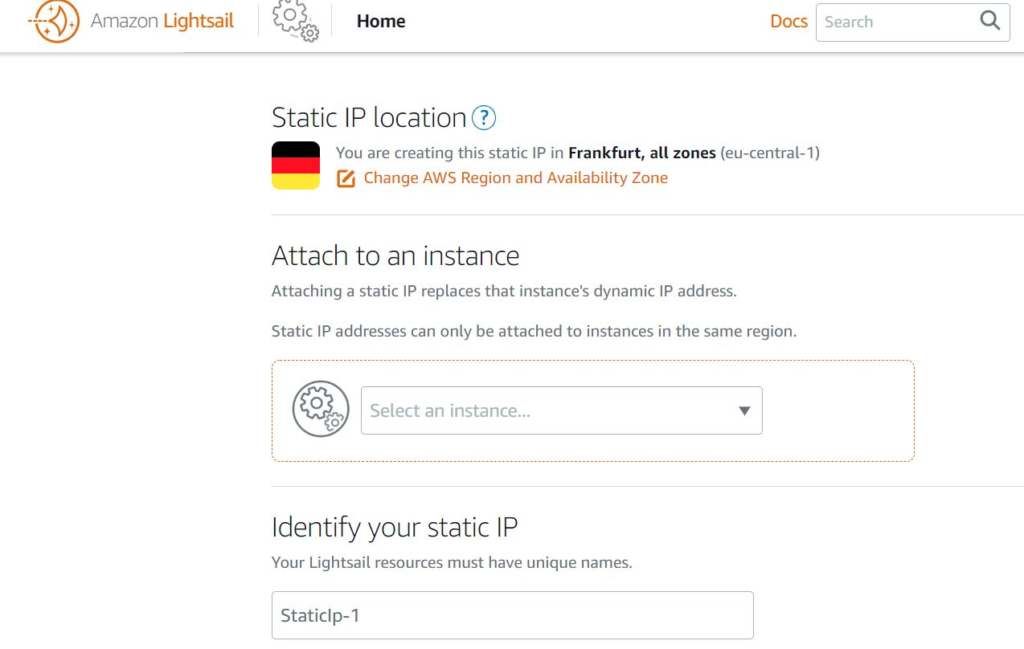
After this stage, it will be enough to give your IP address a name and press the “Create” button.
After the system has now given you your Static IP address, all that remains is to enter your IP address as the “A” record in the domain DNS Management window of your service provider where you use your DNS settings.
After completing this, you can now comfortably log in to your page by typing yourdomain.com/wp-admin.
Result;
Amazon Lightsail will allow you to easily meet your visitor traffic and make your site run faster and more securely.
If there are any topics you want to add or ask, do not hesitate to write in the comments section.
See you in the next article;


